
A month or so ago when Lynne asked for project suggestions using the bundle of Oakshott Lipari cottons, I immediately thought of the St Louis Star block, a traditional paper pieced block which I had come across in The Perfect Patchwork Primer by Beth Gutcheon. The Lipari bundle includes a light/dark pair of each of the colours (blue, green, purple, bronze, grey), which work perfectly with this block design. I was delighted to have the opportunity to make it!
The Liparis are just so glamorous - I think because they're shot with black thread they have a really beautiful glow about them (even more so than the other Oakshotts I've seen). It was pure luxury sewing with them. I paired the Oakshotts with a variety of very light value neutral prints (some text prints, quilters linens, geometrics etc). I love the very subtle movement these fabrics give to the background, and how they make the Oakshotts pop.
I pieced and quilted it entirely using Aurifil 50wt in Dove (2600), on my domestic Bernina. I've used this shade of Aurifil for quilting a couple of quilts with low volume backgrounds recently as it blends beautifully (and I like my quilting to blend as much as possible).

I left the Oakshotts completely unquilted - apart from some stitching in the ditch throught the centre of the stars to stabilise them. It also helped disguise some of my wonkier points :o)

I mostly free motion quilted straight lines following the piecing, and added in a pockets of swirls and pebbles (my current favorite combination of motifs). I like the contrast of traditional blocks in a traditional setting with quilting that's not quite so traditional.

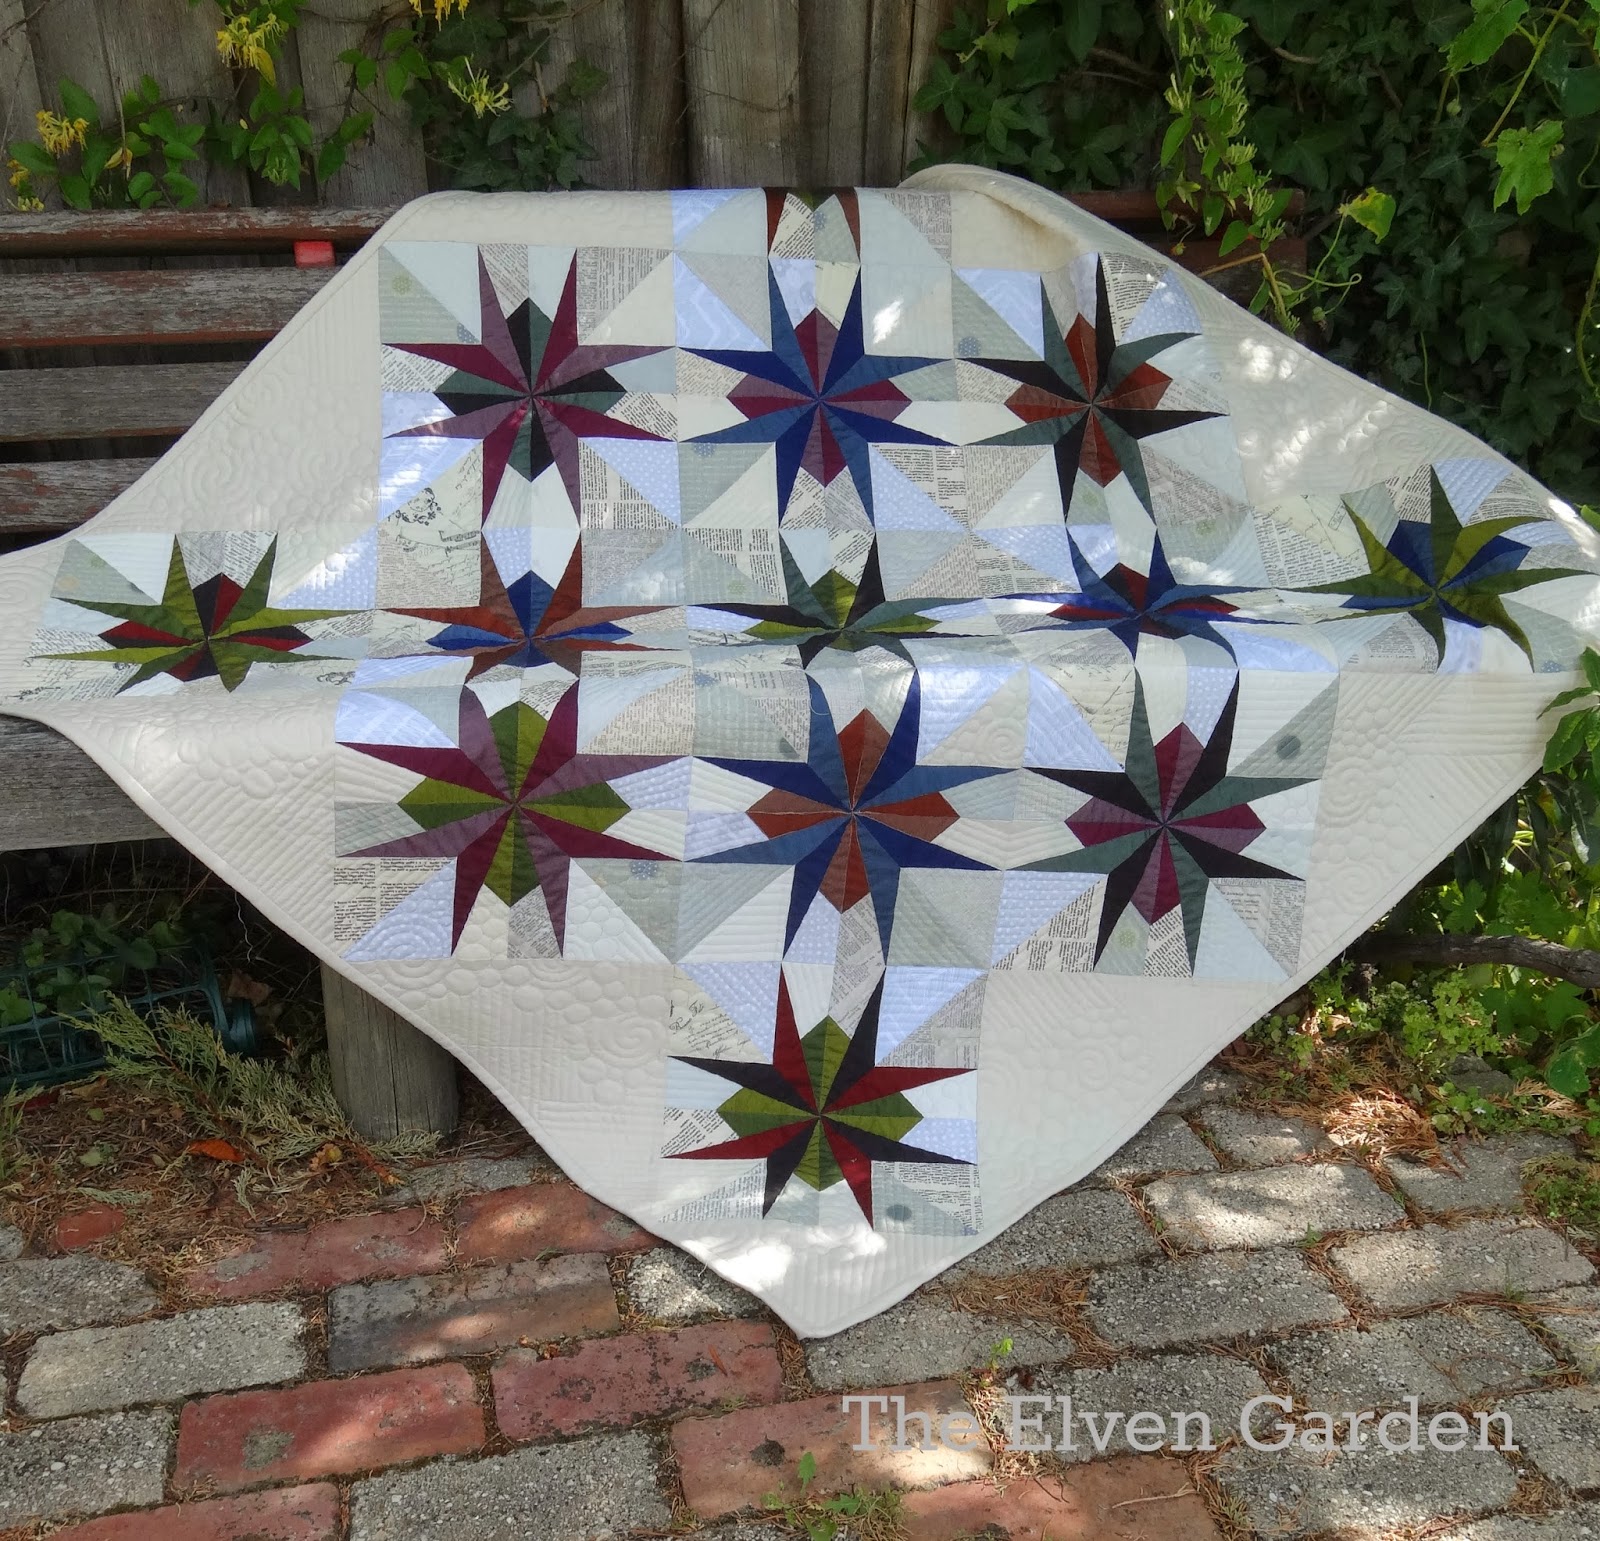
This quilt finished up at 50" square, and is destined to be hung in our hallway which we are painting at the moment.

If you've managed to get this far, I've written up a bit of a tutorial for the block I used. I ended up making thirteen blocks set on point, as shown in this layout.

A second option would be to use partial blocks in place of setting triangles, to produce a quilt like this. This layout consists of thirteen full blocks, along with eight half blocks and four quarter blocks.

St Louis Star Block Tutorial
The St Louis Star block is a 12" finished paper pieced block. Each block is made of eight paper pieced sections - you can download the templates here. The PDF includes four templates (B, C, F, G), on two pages - you will need TWO COPIES OF EACH PAGE for one block. To get the template to print accurately, please save the file to your computer, and then print with no page scaling.
There are essentially two different units in this block - you will have 'B', 'C', 'F' and 'G' templates in the PDF. B and F are identical, as are C and G. You will need two copies of each for one block.
When you've printed your templates and cut them apart, it might be helpful to separate them into two piles - one with B and F together, and one with C and G together.
This diagram shows the units before they are joined together. C/G and B/F alternate around the block. It is also important to point out that the fabric value alternates light/dark/light/dark around the block - so your fabric placement is critical.

I have pressed my seams open unless otherwise noted.
Materials:
For each block, you will need the following:
* A light/dark pair of prints for the outer star in one colour (green in the block shown).
* A light/dark pair of prints for the inner star in a second colour (blue in the block shown)
* Background fabric
Cutting:
Each template has four sections: two solid and two background. The cutting instructions refer to the numbers shown on the template and are the same for both B/F and C/G templates. Section 1 is the inner star, and Section 3 is the outer star.
For each block, you will need:
- SECTION 1: Eight 2" x 4.5" rectangles in one colour - four dark and four light.
- SECTION 2: Eight 3.5" x 4" rectangles in background fabric
- SECTION 3: Eight 2" x 7" rectangles in a second colour, four dark and four light.
- SECTION 4: Four 5.5" squares of background fabric, cut diagonally to yield 8 HSTs

Paper piece your block units following the number order. If you'd like a great paper piecing tutorial, Faith at Fresh Lemons has a great one, and it is a reasonably similar star to this one.
Placement of the Section 1 fabric is critical -
- B/F - use your DARK value fabric for Section 1
- C/G - use your LIGHT value fabric for Section 1
- B/F - use your LIGHT value fabric for Section 3
- C/G - use your DARK value fabric for Section 3.
Once you have pieced your eight units, separate them into four pairs, and join them along the longest edge. I find if I start sewing this seam at the centre of the block (see arrow) my points work out much nicer than sewing in the other direction. I remove the paper within the seam allowance, and then press my seams open when paper piecing.

You will end up with four units. Join these as you would a four patch, first sewing the units into pairs, and then sewing the pairs together.

When sewing the pairs together, I started sewing at the middle of the block, reverse stitching a couple of stitches each time and sewing out to the edge, then repeating for the other side.

You will end up with a 12.5" unfinished block (I forgot to photograph one alone sorry!). I leave my paper on my blocks until I've sewn the whole quilt together, but that's just personal preference.
I absolutely loved working with these fabrics - thanks so much to both Lynne and Michael for giving me the opportunity to play with them!
Jess this is beautiful. It makes the oakshott shine but the quilting is sublime. Beautiful. Di x
ReplyDeleteFabulous block and quilt. Oh and quilting and fabric!
ReplyDeleteI've enjoyed watching your progress on this quilt Jess and it has turned out amazing. It's a perfect pattern to show off the Oakshotts and the quilting it unbelievable.
ReplyDeleteCompletely stunning!
ReplyDeleteIt's an exquisite quilt and a very clear and well-written tutorial - thank you!
ReplyDeleteWow this is one impressive quilt! Love the Oakshotts standing out beautifully against the neutrals - and the quilting is just amazing. No more excuses that I don't have a long arm if Jess can do such great quilting on a domestic!
ReplyDeleteThis is my very favourite type of modern/traditional quilting. Your choice of block is just perfect (I love the secondary circles it produces) but it really is your quilting that is the star and shows off the Oakshotts to perfection. Your hall will look amazing!!
ReplyDeleteOh my Gosh, your FM quilting is really stunning!
ReplyDeleteabsolutely stunning Jess :-)
ReplyDeleteJust stunning, I love the design and how the oakshott sparkles.
ReplyDeletethat jess girl is a freaking genius!
ReplyDeleteBeautiful as always Jess!
ReplyDeleteWhat a great combination. The brilliant Jess paired with Oakshott! I'm in awe of both.
ReplyDeleteThis is one of the most beautiful quilts I've seen in some time. Lots of pretty ones out there, but this quilt really shines!!
ReplyDeleteThank you for the tutorial. Your quilt is gorgeous!
ReplyDeleteWhat a great wall hanging done with gorgeous fabrics. Well done and thanks for the pattern and tutorial.
ReplyDeleteBeautiful quilt Jess!! Love these Oakshott's mixed with your low volume scrappy background. You are such a talent.
ReplyDeleteAmanda
Jess's work is always amazing. I cannot imagine how she does it all on a conventional machine. In awe...
ReplyDeleteSo stunning Jess! The oakshots almost look like silk in the photo!
ReplyDeleteStunning quilt! I love your background fabric selections, and the quilting is so complimentary to the whole quilt. Very lovely!!
ReplyDeleteAbsolutely beautiful!!
ReplyDeleteLove the quilting on this!
ReplyDeleteFabulous quilt, and fabulous quilting. I really enjoyed reading about this quilt. Well done.
ReplyDeleteBrilliant quilt! I'm inspired!
ReplyDeleteThis quilt is wonderful. It looks like cracks in the ice.
ReplyDeleteBrilliant!
ReplyDeleteThis is just stunning!
ReplyDeletePerfect quilting and a stunning quilt!
ReplyDeleteIt is beautiful Jess!
ReplyDeleteAwesome!
ReplyDeleteGorgeous, gorgeous, gorgeous! Love everything about this quilt except that it's not mine...
ReplyDelete